


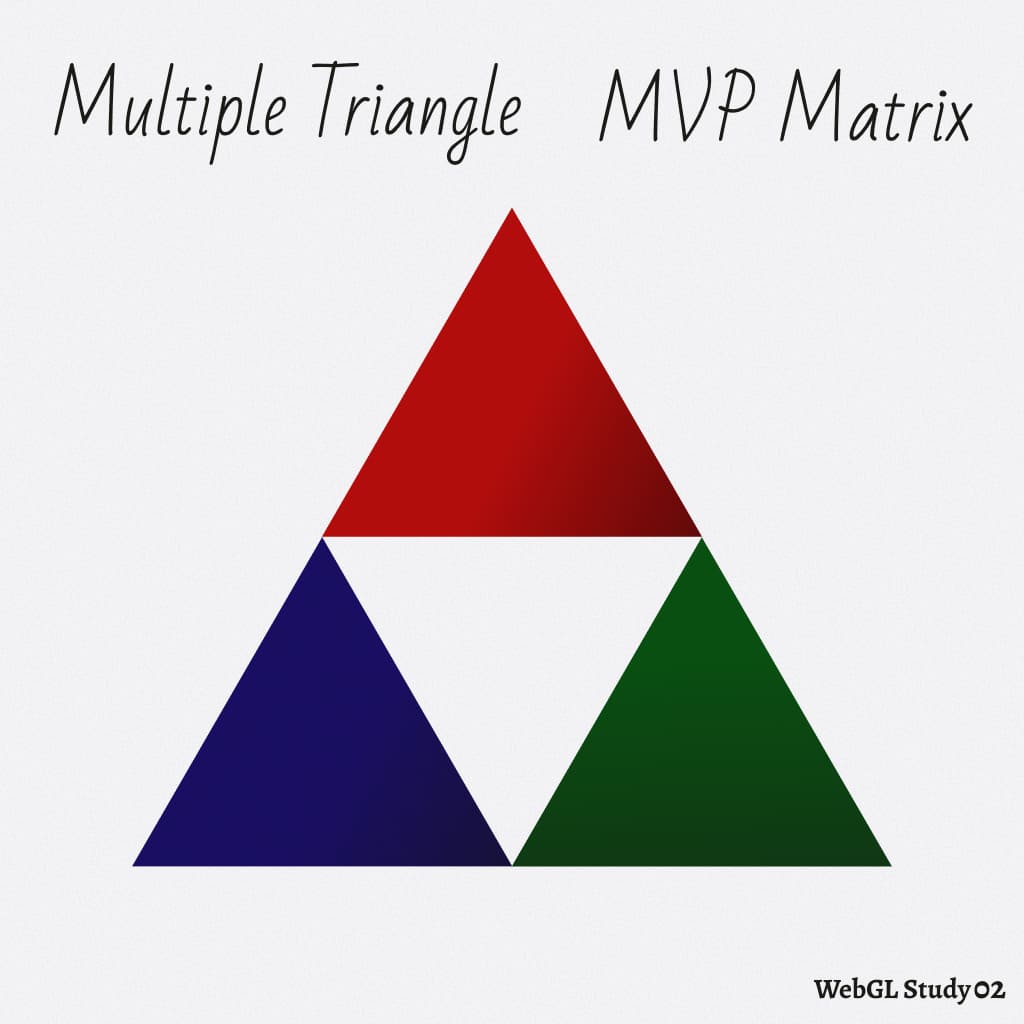
今回は、WebGLやCGでの3次元描画をする上で必要な知識となるMVP行列を紹介します。そしてCameraクラスを作成し、一つの頂点バッファでサムネの画像にあるような複数の三角形を描画する方法まで解説します。
この記事でわかること
- MVP行列の理解
- Cameraクラスの作成
- WebGLで一つの頂点バッファで複数の三角形の描画する方法
はじめに
前回は、素のWebGLで三角形を描画するまで行いました。
今回は、MVP行列について理解を深め、Cameraクラスを作成して、一つの頂点バッファで複数の三角形を描画する方法を解説します。
コードはGitHubで公開しているので参考にしてみてください!
前回からの差分はこちらになります。
WebGL JavaScript APIには行列操作を実現する独自のメソッドはありません。一般的にはglMatrixなどの外部ライブラリを導入しますが、このサイトでは学習のためにOGlを参考にした独自の行列演算クラスを使用しています。使い方を詳しくは解説しませんが、コードはここのmathフォルダで公開しているので確認してみてください
前回のクリップ空間での描画の問題点
前回は、vertex shaderで下記のようにクリップ空間(-1~1)で三角形を描画していました。
gl_Position = vec4(position, 1.0);
この方法では、複数の三角形を描画するたびに、描画する三角形の座標を全部書く必要があります。
また、カメラもワールドも存在しないため、移動・回転・拡大縮小などの操作もできません。
そこで、MVP行列を使って、これらの問題を解決していきます。
MVP行列の役割
MVP行列は、Model(モデル)、View(ビュー)、Projection(投影)の3つの行列を組み合わせたもので、3D空間の座標をスクリーン上に正しく描画するために使用されます。役割としては次のようになります。
| 行列 | 役割 |
|---|---|
| Model | モデルの位置・回転・拡大縮小 |
| View | カメラの位置 |
| Projection | 投影(透視・正射影) |
最終的にvertex shaderでは次のようにMVP行列を使って、頂点の座標を変換して描画します。
gl_Position = projectionMatrix * modelViewMatrix * vec4(position, 1.0);
この記事では、ModelとViewをまとめてmodelViewMatrixとします。
実際にWebGL内で頂点の変換をどのように実装するかの流れは次のようになります。
オブジェクト座標
  ↓
モデルビュー行列
  ↓
投影行列
  ↓
gl.viewport
  ↓
ビューポート座標
- モデルビュー行列は先述のとおりモデル変換とビュー変換をひとつにまとめたものです。この行列と頂点座標を掛け合わせることで、ビュー座標が得られます。
- 投影行列は投影変換と透視分割をひとつにまとめたものです。適用すると正規化デバイス座標(NDC)が得られます。
- 最後に
gl.viewport操作を使用してNDCとビューポート座標を紐づけます。ビューポート座標の原点はcanvasの左下です。
複数の三角形を描画

それでは、前回の記事のコードを修正して、複数の三角形を描画していきましょう。
まずはTransformクラスを作成していきます。
Transform
Transformクラスは、オブジェクトの位置・回転・拡大縮小を管理するクラスになります。
また、シーングラフ(親子関係)も管理しています。
この記事では、位置だけを使用するので、回転・拡大縮小の機能は後ほど実装します。
import { Mat4 } from '../math/Mat4';
import { Vec3 } from '../math/Vec3';

export class Transform {
  parent: Transform | null = null;
  children: Transform[] = [];

  matrix: Mat4;
  worldMatrix: Mat4;

  matrixAutoUpdate: boolean;
  worldMatrixNeedsUpdate: boolean;

  position: Vec3;

  constructor() {
    this.parent = null;
    this.children = [];

    this.matrix = new Mat4();
    this.worldMatrix = new Mat4();
    this.matrixAutoUpdate = true;
    this.worldMatrixNeedsUpdate = false;

    this.position = new Vec3();
  }

  updateMatrixWorld(force?: boolean) {
    if (this.matrixAutoUpdate) this.updateMatrix();

    if (this.worldMatrixNeedsUpdate || force) {
      if (this.parent === null) {
        this.worldMatrix.copy(this.matrix);
      } else {
        this.worldMatrix.multiply(this.parent.worldMatrix, this.matrix);
      }

      this.worldMatrixNeedsUpdate = false;
    }

    for (let i = 0; i < this.children.length; i++) {
      this.children[i].updateMatrixWorld(force);
    }
  }

  updateMatrix() {
    this.matrix.identity();
    this.matrix.translate(this.position);

    this.worldMatrixNeedsUpdate = true;
  }
}
行列関連
matrix: Mat4;
worldMatrix: Mat4;
matrixはローカル空間での変換行列になります。worldMatrixはワールド空間での変換行列になり親の影響込みの最終的な変換行列になります。
更新制御フラグ
matrixAutoUpdate: boolean;
worldMatrixNeedsUpdate: boolean;
matrixAutoUpdateは、trueの場合、毎回updateMatrixが呼び出されるようになります。falseの場合は、手動制御になり最適化用に使用します。
worldMatrixNeedsUpdateは、再計算が必要化のフラグになります。無駄な計算を防ぐためのキャッシュの役割になります。
updateMatrixの役割
updateMatrix() {
  this.matrix.identity();
  this.matrix.translate(this.position);

  this.worldMatrixNeedsUpdate = true;
}
updateMatrixは、ローカル空間での変換行列を更新するメソッドになります。流れとしては、identityで単位行列に初期化してから、translateで平行移動を行い、位置を反映させています。最後にワールド更新のフラグをtrueにします。
updateMatrixWorldの役割
updateMatrixWorld(force?: boolean) {
  if (this.matrixAutoUpdate) this.updateMatrix();

  if (this.worldMatrixNeedsUpdate || force) {
    if (this.parent === null) {
      this.worldMatrix.copy(this.matrix);
    } else {
      this.worldMatrix.multiply(this.parent.worldMatrix, this.matrix);
    }

    this.worldMatrixNeedsUpdate = false;
  }

  for (let i = 0; i < this.children.length; i++) {
    this.children[i].updateMatrixWorld(force);
  }
}
ステップ1:ローカル更新
if (this.matrixAutoUpdate) this.updateMatrix();
matrixAutoUpdateの自動更新が有効の場合は、毎回ローカルの変換行列を更新します。
ステップ2:ワールド行列の更新判定
if (this.worldMatrixNeedsUpdate || force)
必要な場合のみワールド行列を更新します。forceは強制的に更新するためのフラグになります。
ステップ3:親との合成
this.worldMatrix.copy(this.matrix);
parent(親)がいない場合(ルート)は、ローカル行列をワールド行列にコピーします。
this.worldMatrix.multiply(this.parent.worldMatrix, this.matrix);
parent(親)がいる場合は、親のワールド行列とローカル行列を掛け合わせてワールド行列を更新します。
ステップ4:子ノードへの伝播
for (let i = 0; i < this.children.length; i++) {
  this.children[i].updateMatrixWorld(force);
}
最後に、再帰的に子ノードのワールド行列も更新します。Transformクラスの変更は以上になります。
続いては、Meshクラスを修正していきます。
Mesh
まずは、MeshクラスにSceneクラスを継承させます。
import { Scene } from './Scene';

export class Mesh extends Scene
処理の流れとしては次のようになってます。
Transform(座標・行列)
   ↓
Scene(親子構造)
   ↓
Mesh(描画)
Meshクラスはすでに、ローカル変換とワールド行列、親子構造を持っているので、あとは描画の部分を実装していくだけになります。
全体のコードは次のようになります。
import type { Camera } from './Camera';
import type { Geometry } from './Geometry';
import type { Program } from './Program';

import { Mat4 } from '../math/Mat4';
import { Scene } from './Scene';

type MeshRenderCallback = (renderInfo: { mesh: Mesh; camera?: Camera }) => void;

export class Mesh extends Scene {
  gl: WebGL2RenderingContext;
  geometry: Geometry;
  program: Program;

  modelViewMatrix: Mat4;

  constructor(gl: WebGL2RenderingContext, { geometry, program }: { geometry: Geometry; program: Program }) {
    super();
    this.gl = gl;
    this.geometry = geometry;
    this.program = program;

    this.modelViewMatrix = new Mat4();
  }

  draw({ camera }: { camera?: Camera }) {
    const program = this.program;
    const geometry = this.geometry;
    const gl = this.gl;

    if (camera) {
      if (!program.uniforms.modelMatrix) {
        Object.assign(program.uniforms, {
          modelMatrix: { value: null },
          viewMatrix: { value: null },
          modelViewMatrix: { value: null },
          projectionMatrix: { value: null },
          cameraPosition: { value: null },
        });
      }

      program.uniforms.projectionMatrix.value = camera.projectionMatrix;
      program.uniforms.cameraPosition.value = camera.worldPosition;
      program.uniforms.viewMatrix.value = camera.viewMatrix;
      this.modelViewMatrix.multiply(camera.viewMatrix, this.worldMatrix);
      program.uniforms.modelMatrix.value = this.worldMatrix;
      program.uniforms.modelViewMatrix.value = this.modelViewMatrix;
    }

    program.use();
    geometry.bind(program);
    gl.drawElements(gl.TRIANGLES, geometry.indexCount, gl.UNSIGNED_SHORT, 0);
    geometry.unbind();
  }
}
draw
Meshで描画するdrawメソッドをみていきます。
draw({ camera }: { camera?: Camera }) {
  const program = this.program;
  const geometry = this.geometry;
  const gl = this.gl;

  if (camera) {
    if (!program.uniforms.modelMatrix) {
      Object.assign(program.uniforms, {
        modelMatrix: { value: null },
        viewMatrix: { value: null },
        modelViewMatrix: { value: null },
        projectionMatrix: { value: null },
        cameraPosition: { value: null },
      });
    }

    program.uniforms.projectionMatrix.value = camera.projectionMatrix;
    program.uniforms.cameraPosition.value = camera.worldPosition;
    program.uniforms.viewMatrix.value = camera.viewMatrix;
    this.modelViewMatrix.multiply(camera.viewMatrix, this.worldMatrix);
    program.uniforms.modelMatrix.value = this.worldMatrix;
    program.uniforms.modelViewMatrix.value = this.modelViewMatrix;
  }

  program.use();
  geometry.bind(program);
  gl.drawElements(gl.TRIANGLES, geometry.indexCount, gl.UNSIGNED_SHORT, 0);
  geometry.unbind();
}
uniformの初期化
if (camera) {
  if (!program.uniforms.modelMatrix) {
    Object.assign(program.uniforms, {
      modelMatrix: { value: null },
      viewMatrix: { value: null },
      modelViewMatrix: { value: null },
      projectionMatrix: { value: null },
      cameraPosition: { value: null },
    });
  }
}
カメラが存在する場合と、uniformsにmodelMatrixが存在しない場合は、uniformsにMVP行列関連のuniformの初期化を行います。
カメラ情報の反映
program.uniforms.projectionMatrix.value = camera.projectionMatrix;
program.uniforms.cameraPosition.value = camera.worldPosition;
program.uniforms.viewMatrix.value = camera.viewMatrix;
カメラの投影行列、ワールド位置、ビュー行列をuniformに反映させます。
ModelView行列の計算
this.modelViewMatrix.multiply(camera.viewMatrix, this.worldMatrix);
ModelView行列は、ビュー行列とワールド行列を掛け合わせて計算します。
MV = V x M
Model行列とModelView行列の反映
program.uniforms.modelMatrix.value = this.worldMatrix;
program.uniforms.modelViewMatrix.value = this.modelViewMatrix;
Model行列とModelView行列をuniformに反映させます。
カメラがある場合は上記のような処理になります。
最後にprogram.use()を呼び出してシェーダープログラムを有効化し、ジオメトリをバインドして描画します。
次に、このMeshのdrawメソッドを呼び出す、Renderクラスを修正します。
Render
Renderクラスのrenderメソッドで、シーンとカメラがある場合は、updateMatrixWorldを呼び出して、シーン内の全てのノードのワールド行列を更新するようにします。
import type { Camera } from './Camera';
import { Mesh } from './Mesh';
import type { Scene } from './Scene';

export class Render {
  // ...
  render(
    options: Partial<{
      scene: Scene;
      camera: Camera;
    }>,
  ) {
    const { scene, camera } = options;
    const gl = this.gl;
    gl.viewport(0, 0, this.canvas.width, this.canvas.height);
    gl.clear(gl.COLOR_BUFFER_BIT | gl.DEPTH_BUFFER_BIT);

    if (scene) {
      scene.updateMatrixWorld();
    }

    if (camera) {
      camera.updateMatrixWorld();
    }

    scene?.traverse(node => {
      if (node instanceof Mesh) {
        node.draw({ camera });
      }
    });
  }
}
最後に、Cameraクラスを作成していきます。
Camera
今回、新規に作成するCameraクラスは次のようになります。
import { Mat4 } from '../math/Mat4';
import { Vec3 } from '../math/Vec3';
import { Transform } from './Transform';

interface CameraOptions {
  near: number;
  far: number;
  fov: number;
  aspect: number;
  left: number;
  right: number;
  bottom: number;
  top: number;
  zoom: number;
}

interface PerspectiveOptions extends Pick<CameraOptions, 'near' | 'far' | 'fov' | 'aspect'> {}

type CameraType = 'perspective' | 'orthographic';

export class Camera extends Transform {
  projectionMatrix: Mat4;
  viewMatrix: Mat4;
  projectionViewMatrix: Mat4;
  worldPosition: Vec3;

  type: CameraType;

  near: number;
  far: number;
  fov: number;
  aspect: number;
  left?: number;
  right?: number;
  bottom?: number;
  top?: number;
  zoom: number;

  constructor(gl: WebGL2RenderingContext, options?: Partial<CameraOptions>) {
    super();

    const { near = 0.1, far = 100, fov = 45, aspect = 1, left, right, bottom, top, zoom = 1 } = options || {};

    this.near = near;
    this.far = far;
    this.fov = fov;
    this.aspect = aspect;
    this.left = left;
    this.right = right;
    this.bottom = bottom;
    this.top = top;
    this.zoom = zoom;

    this.projectionMatrix = new Mat4();
    this.viewMatrix = new Mat4();
    this.projectionViewMatrix = new Mat4();
    this.worldPosition = new Vec3();

    this.type = left || right ? 'orthographic' : 'perspective';

    if (this.type === 'orthographic') {
      this.orthographic();
    } else {
      this.perspective();
    }
  }

  perspective(options?: Partial<PerspectiveOptions>) {
    const { near = this.near, far = this.far, fov = this.fov, aspect = this.aspect } = options || {};

    Object.assign(this, { near, far, fov, aspect });
    this.projectionMatrix.fromPerspective({ fov: fov * (Math.PI / 180), aspect, near, far });
    this.type = 'perspective';
    return this;
  }

  orthographic({
    near = this.near,
    far = this.far,
    left = this.left || -1,
    right = this.right || 1,
    bottom = this.bottom || -1,
    top = this.top || 1,
    zoom = this.zoom,
  } = {}) {
    Object.assign(this, { near, far, left, right, bottom, top, zoom });
    left /= zoom;
    right /= zoom;
    bottom /= zoom;
    top /= zoom;
    this.projectionMatrix.fromOrthogonal({ left, right, bottom, top, near, far });
    this.type = 'orthographic';
    return this;
  }

  updateMatrixWorld() {
    super.updateMatrixWorld();
    this.viewMatrix.inverse(this.worldMatrix);
    this.worldMatrix.getTranslation(this.worldPosition);

    this.projectionViewMatrix.multiply(this.projectionMatrix, this.viewMatrix);
    return this;
  }
}
このクラスは、Transformクラスを継承しているため、位置や行列の管理ができるようになっています。
また、カメラ特有のプロパティやメソッドも追加しています。
projectionMatrix: 投影行列を格納するプロパティviewMatrix: ビュー行列を格納するプロパティprojectionViewMatrix: 投影行列とビュー行列を掛け合わせた行列を格納するプロパティworldPosition: ワールド空間でのカメラの位置を格納するプロパティtype: カメラのタイプを格納するプロパティ(透視投影か正射影か)perspective: 透視投影を設定するメソッドorthographic: 正射影を設定するメソッドupdateMatrixWorld: ワールド行列を更新する際に、ビュー行列や投影ビュー行列も更新するようにオーバーライドしたメソッド になります。
fromPerspectiveやfromOrthogonalは、投影行列を計算するために自前で実装したメソッドになります。これらのメソッドは、Mat4クラスの中に実装しているので、そちらを確認してみてください。
これで、Cameraクラスの実装は以上になります。
使用方法
一つの頂点バッファで複数の三角形を描画する方法の準備が整ったので、実際に描画してみましょう。
全体のコードは次のようになります。
import { Camera, Geometry, Mesh, Program, Render, Scene } from '@/lib/webgl';

import fragment from './index.frag?raw';
import vertex from './index.vert?raw';

export const onload = () => {
  const canvas = document.getElementById('webgl-canvas') as HTMLCanvasElement;
  const render = new Render(canvas);
  render.fitScreen();
  const gl = render.gl;
  gl.clearColor(1.0, 1.0, 1.0, 1.0);

  const camera = new Camera(gl, { fov: 45, near: 0.1, far: 100 });
  camera.position.z = 3;

  const scene = new Scene();

  const positions = new Float32Array([0.0, 0.5, 0.0, -0.5, -0.5, 0.0, 0.5, -0.5, 0.0]);
  const uvs = new Float32Array([0, 0, 1, 0, 0, 1]);
  const indices = new Uint16Array([0, 1, 2]);

  const geometry = new Geometry(gl, {
    position: { size: 3, data: positions },
    uv: { size: 2, data: uvs },
    index: { size: 1, data: indices },
  });

  const program = new Program(gl, {
    vertex,
    fragment,
    uniforms: {
      uTime: { value: 0 },
    },
  });

  const triangle1 = new Mesh(gl, { geometry, program });
  triangle1.position.x = -0.5;
  triangle1.position.y = -0.5;
  scene.add(triangle1);

  const triangle2 = new Mesh(gl, { geometry, program });
  triangle2.position.x = 0.5;
  triangle2.position.y = -0.5;
  scene.add(triangle2);

  const triangle3 = new Mesh(gl, { geometry, program });
  triangle3.position.y = 0.5;
  scene.add(triangle3);

  const update = () => {
    render.render({ scene, camera });

    requestAnimationFrame(update);
  };

  update();

  const resize = () => {
    render.setSize(window.innerWidth, window.innerHeight);
    camera.perspective({ aspect: gl.canvas.width / gl.canvas.height });
  };
  window.addEventListener('resize', resize);
};
OGLやThree.jsなどを参考にしているので、おおむね同じようなコード構成になっていると思います。複数の三角形を描画するために、同じジオメトリとプログラムを使用して、Meshクラスのインスタンスを複数作成し、位置を変更してSceneに追加しています。
最後にVertex Shaderのコードをみていきましょう。
#version 300 es
precision mediump float;

in vec3 position;
in vec2 uv;

uniform mat4 modelViewMatrix;
uniform mat4 projectionMatrix;

out vec2 vUv;

void main() {
  vUv = uv;
  gl_Position = projectionMatrix * modelViewMatrix * vec4(position, 1.0);
}
以上を実行すると、サムネのような複数の三角形が描画されるようになります。
まとめ
一つの頂点バッファで複数の三角形を描画するために、MVP行列の紹介と諸々の実装をしてきました。記事内だと詳しく解説できてない部分もあるので、実際にコードを見ながら理解してみてください。
次回は、WebGLで平面ジオメトリを作成して描画する方法を解説していきます。